The Index Card Hack
Challenge:
How do I get a classroom of 20+ students up and running with the materials I'm testing while also capturing each student's demographic information, feedback, survey responses, etc. all within a 30 minute class period?
A design direction should always be tested in the environment in which it is intended to be used – and when it comes to educational technology, that environment is quite often a K-12 classroom. Now, I’m not sure the last time any of you were in a K-12 classroom but getting 20+ students on the same page with anything is like herding cats into a wet bag – all it takes is one student getting off track to bring the whole operation to a standstill. Suffice it to say, one of the challenges I faced when working in this industry is figuring out how to get a classroom of students up and running with the materials being tested while also collecting each student’s demographic info, written feedback, post-test survey responses, etc. all before the bell rings. Luckily, over the years I’ve learned how to do this quite effiencetly using a method I’ve dubbed the Index Card Hack.
Schematic: The Index Card Hack
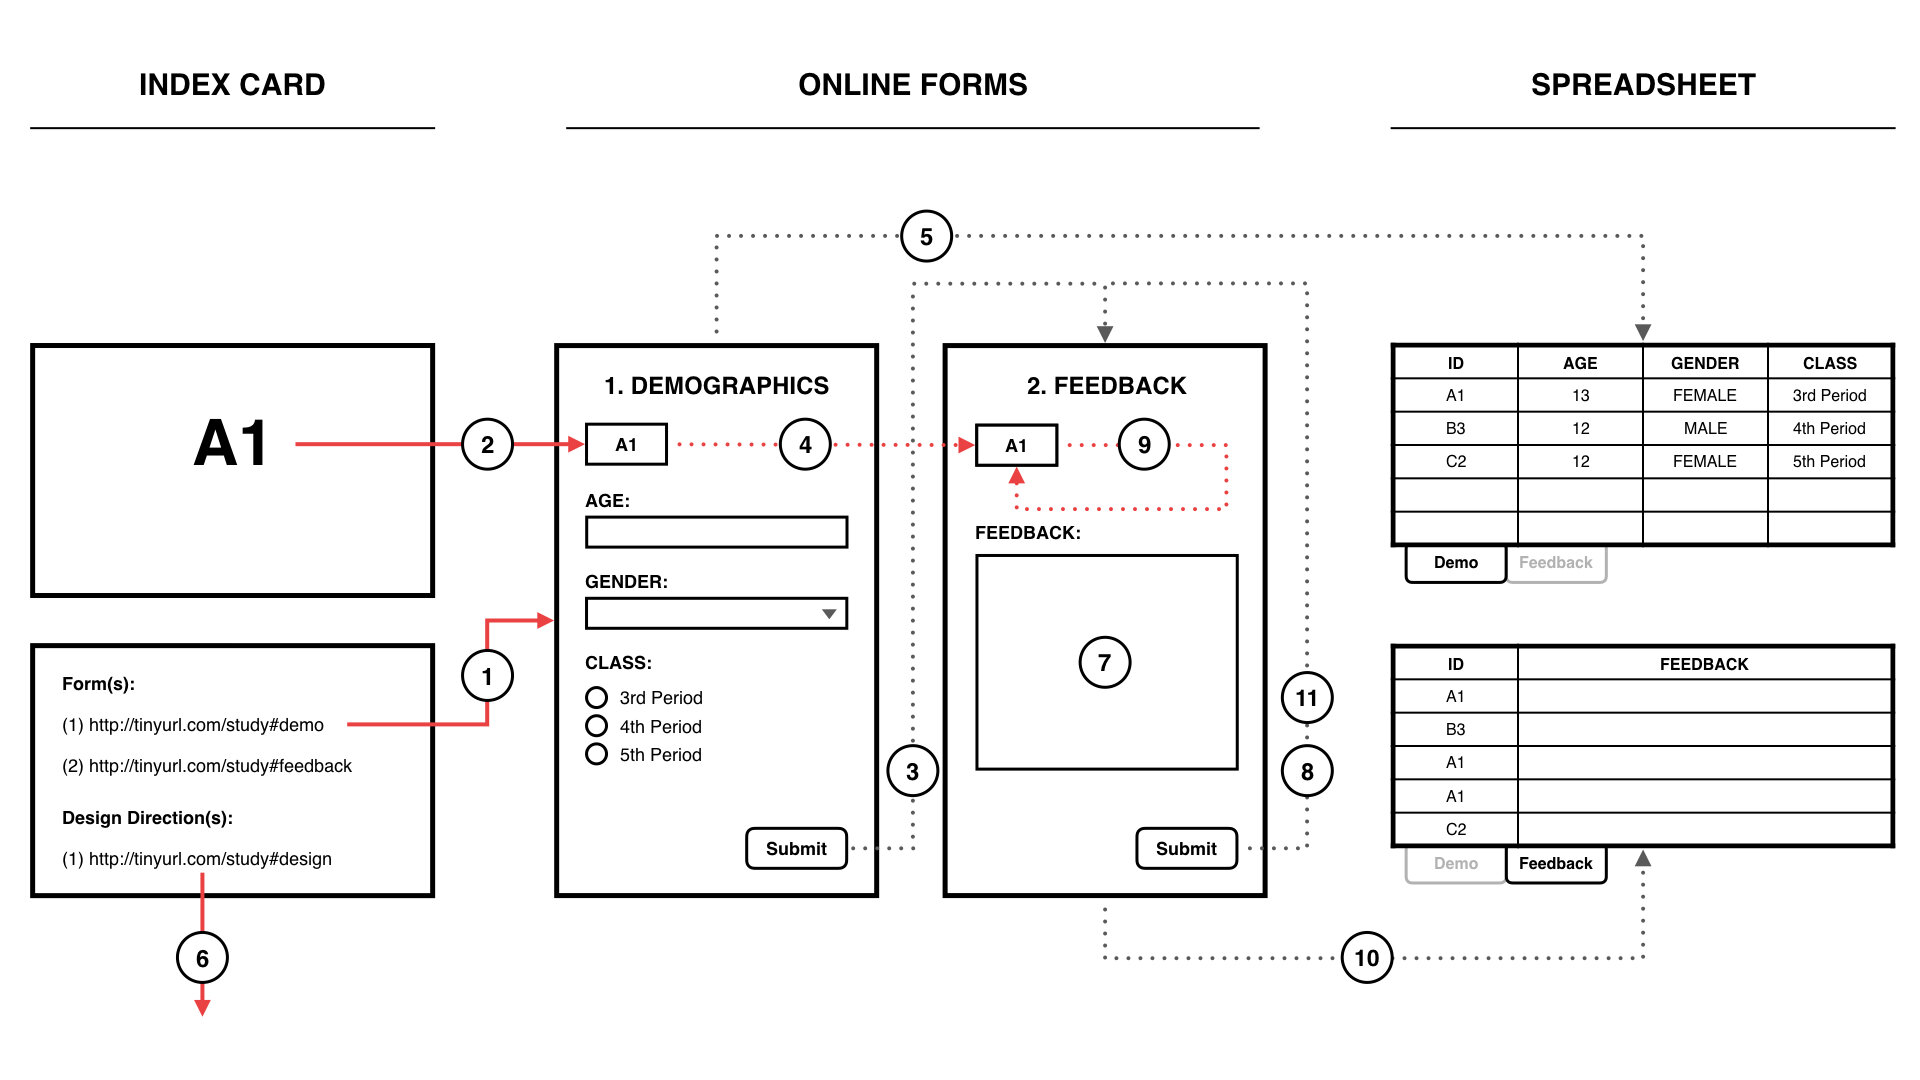
Student types in short URL to access the demographics form
Student inputs his/her unique ID# and fills out form
Student submits demographics form and is redirected to the looping feedback form
Student’s ID# is automatically filled into the ID field in feedback form
Student’s ID# and demographic information creates a new record in the demographics tab of the spreadsheet
Student types in short URL to access the design direction (open in new tab)
Student inputs feedback while interacting with the design direction
Student submits feedback form and the form redirects to itself
Student’s ID# is automatically filled into the ID field when the form redirects
Student’s ID# and feedback creates a new record in the feedback tab of the spreadsheet
Student continues to submit feedback as needed while interacting with the design direction

MY SOLUTION:
Hand each participant an index card with a unique ID# on the front and a list of URLs on the back. Here, each index card is kind of like a key the students use to access the study’s forms and design directions. However, running in the background is a system that leverages the data-passing functionality found in Wufoo (online forms) and Zapier (web app connection and task automation) to collect the data entered into those forms and automatically aggregate it into a centralized location – typically a Google Spreadsheet. Further, by having the students use the unique ID# as their personal identifier, all their submitted data (i.e. their demographic info, feedback, survey responses, etc.) gets tied together on the backend without the need for any personally identifying information.
This is how the index card hack plays out in real-life:
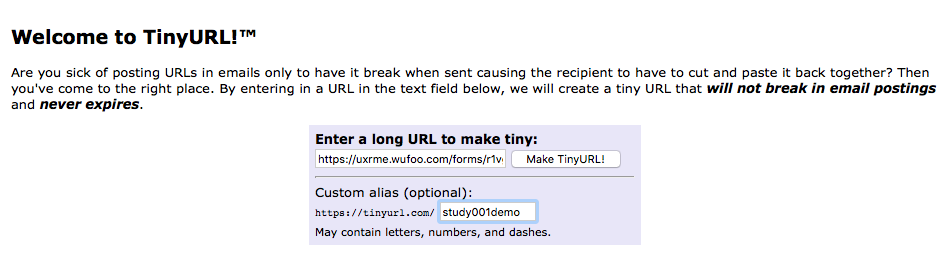
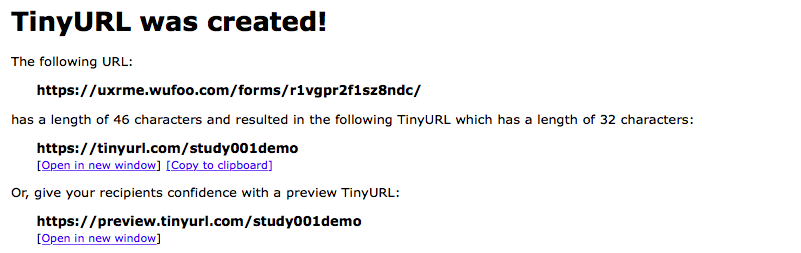
I walk into a classroom with a stack of index cards that each have a unique, two-digit, alpha-numeric ID# on the front and a list of URLs on the back. Here, the same list of URLs is on each card. Further, I will have used tinyurl.com’s custom alias feature to convert what would normally be lengthy URLs into ones that are easier for the students to read and type.
I hand each student an index card and instruct them to enter the 1st URL [demographics] into their browser. This takes the students to a demographics form which asks for their ID#, age, gender, class period, and anything else I want to collect. No personally identifying info though – that’s the point of the unique ID#.
I instruct the students to fill out the form and to use the ID# on the front of their card for the field labeled ID# in the form.
I instruct the students to submit the form. This (1) sends their demographic info to a spreadsheet I setup during preparation to receive all submitted data and (2) redirects the students to a second form designed to collect open-ended feedback. Here, the students’ unique ID#s are already filled in at the top. At this point, I instruct the students to stop what they’re doing.
I instruct the students to open a new tab in their browser and to enter in the 2nd URL [design direction]. This takes the students to the material with which they will be interacting. Note, if the material requires a password or some form of credentials to access, then that info will be on the index card as well.
I instruct the students to interact with the material in a manner based on the parameters of the study. This could be anything from completing specific tasks to a free explore to doing what the teacher tells them. I also instruct the students to use the feedback form in the first tab to submit any thoughts, feedback, issues, etc. they have while interacting with the material – and to submit each entry separately as they come up. Two things happen when a student submits the form: (1) the feedback and the student’s ID# gets sent to the same linked spreadsheet and (2) the form resets itself but keeps the ID# filled in allowing for rolling submissions.
Now, you probably thinking “Whelp, this seems like a lot of work to setup…”. Yes, yes it is. However, I assure you the legwork pays off in spades as you’ll be able to collect exponentially more information in less time and with less effort. Plus, I’m going to walk you through how to do it – and once you get the hang of the basics, you’ll naturally see how to adjust this hack to work for your specific needs. We’ll start by setting up our forms.
Forms
There are many survey tools out there each with their own pros and cons. As a researcher, it’s important to know the capabilities of all the tools in your toolbox and how to leverage them to suit your needs. Wufoo is a survey tool that I believe provides some of the best features for hacking systems, like the one discussed in this post, together. To keep it simple, we’ll focus on a system that captures student demographic information then redirects to a looping open-ended feedback from. The feedback form will allow students to input feedback about their experience with the design direction simply by switching between tabs. As they encounter something, they can just switch to the tab, type in the feedback, submit (which refreshes the form), and then return to interacting with the design direction.
In Wufoo, we’ll want to create two forms: one we’ll label 1. Demographics and another we’ll label 2. Feedback.

In the 1. Demographics form we’ll add four fields:
*A single line text field labeled ID#
A number field labeled AGE
A dropdown field labeled GENDER
A multiple choice (single select) field labeled CLASS
*MAKE SURE TO ADD THE ID# FIELD FIRST!!!!

In the 2. Feedback form we’ll add two fields:
*A single line text field labeled ID#
A paragraph Text field labeled FEEDBACK
*MAKE SURE TO ADD THE ID# FIELD FIRST!!!!
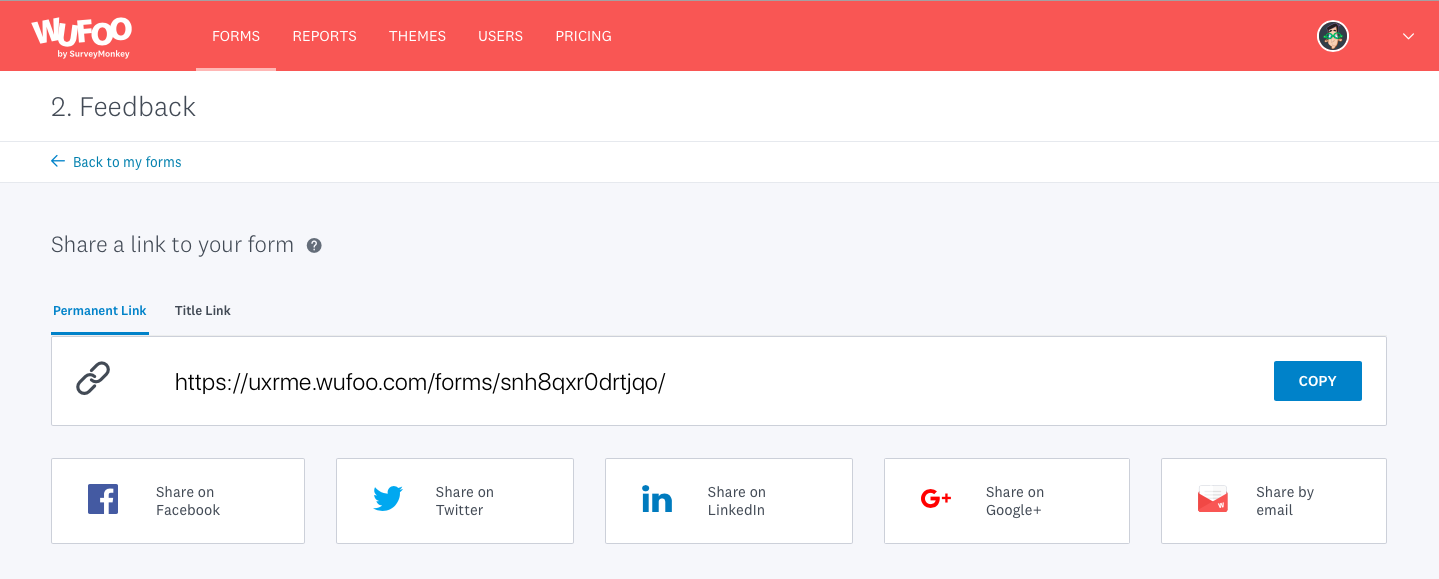
Now, we’ll want to get the Permanent Link to the 2. Feedback form. It’s important to get the Permanent Link and NOT the Title Link. The Title Link is a link that uses the actual title of the form in the URL itself. Meaning, if you change the title of the form, the link you grabbed earlier will no longer work. Trust me, you don’t want to make this mistake when setting up a complex system – by using the Permanent Link you can set the system up and change the title all you want without breaking the system.
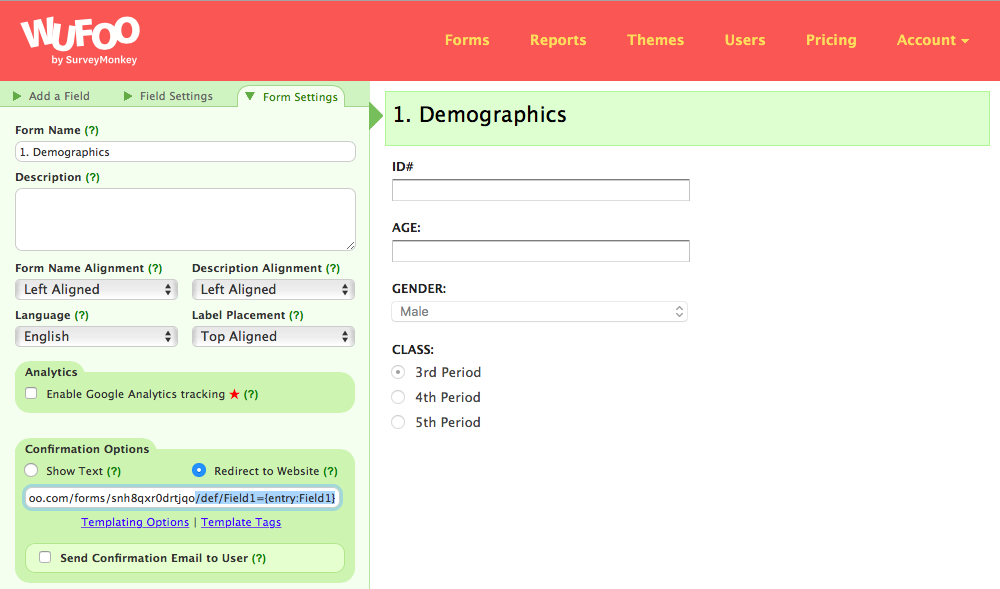
Go back into the Demographics from and open up Form Settings. Here, we’ll change the Confirmation Options to Redirect to Website. This website of course is the Feedback form link we just copied. We’ll paste it into the field but we’re not done yet. Add the following to the end of the URL:
def/Field1=[entry:Field1]
This is parameter passing – one of Wufoo’s nifty features. See, if one Wufoo form redirects to another Wufoo form, you can set up a parameter pass to autofill a field in the second form with data entered into a field in the first form. The parameter pass above says to take the data in Field1 of Demographics (ID#) and pass it to Field1 in Feedback (also ID#). This is why it was important to add the ID# fields first when creating the two forms – by adding them first Wufoo identifies them as Field1.
So why are we doing this? Well, two reasons:
A better user experience for the participants – one less step
We’ll be using the unique ID#s to tie each participant’s data together
Highlight the full permanent link including the parameter passing info you added, copy it, save the Demographics form and open up the Feedback form.

In the Feedback form, go to Form Settings, Confirmation Options, Redirect to Website, paste in the full permanent link with the parameter passing info, and save the form.

Now, test everything out by filling out the Demographics form like a student would. When you submit the Demographics form, you should be redirect to the Feedback form with the info in the ID# field autofilled. Further, when you submit the Feedback form, it should refresh but the ID# field should be autofilled with the same unique ID# you typed into the Demographics form. You now have a system to collect rolling feedback that doesn’t require the student to type in their ID# each time.
Now it’s time to set up our spreadsheet which will eventually receive all the responses submitted via the Demographics and Feedback forms.
Spreadsheet
Setting up our spreadsheet is relatively straight forward. We’ll need to create two tabs: DEMO and FEEDBACK. If you have a lot of spreadsheets in your account’s Drive, I suggest titling this spreadsheet with something that distinguishes it from the rest – you’ll need to pick it out of a lineup later on.
A word of advice: If you’re conducting a lot of studies – especially in parallel, hopefully you’ve come up with a naming/cataloguing system that allows you to keep track of a given study’s related files, folders, projects, etc. as they exist within the various tools you use.
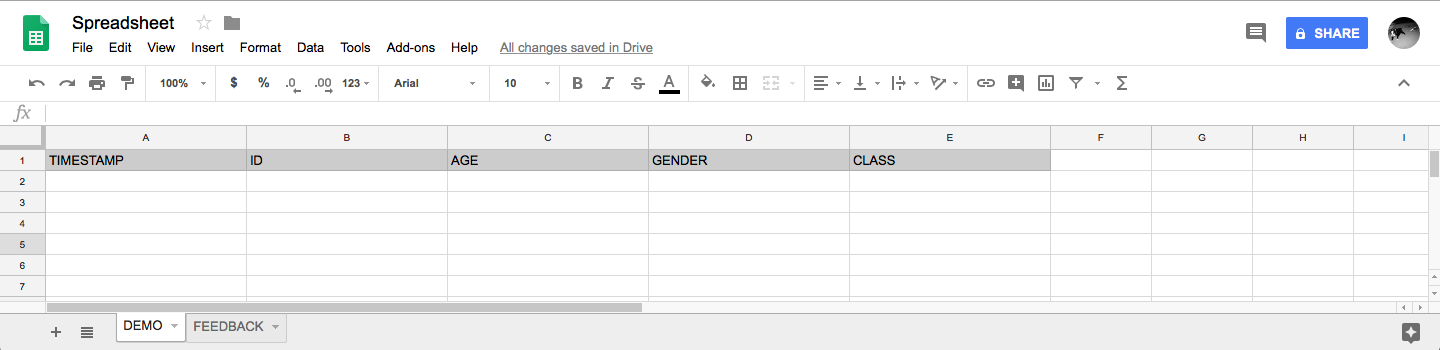
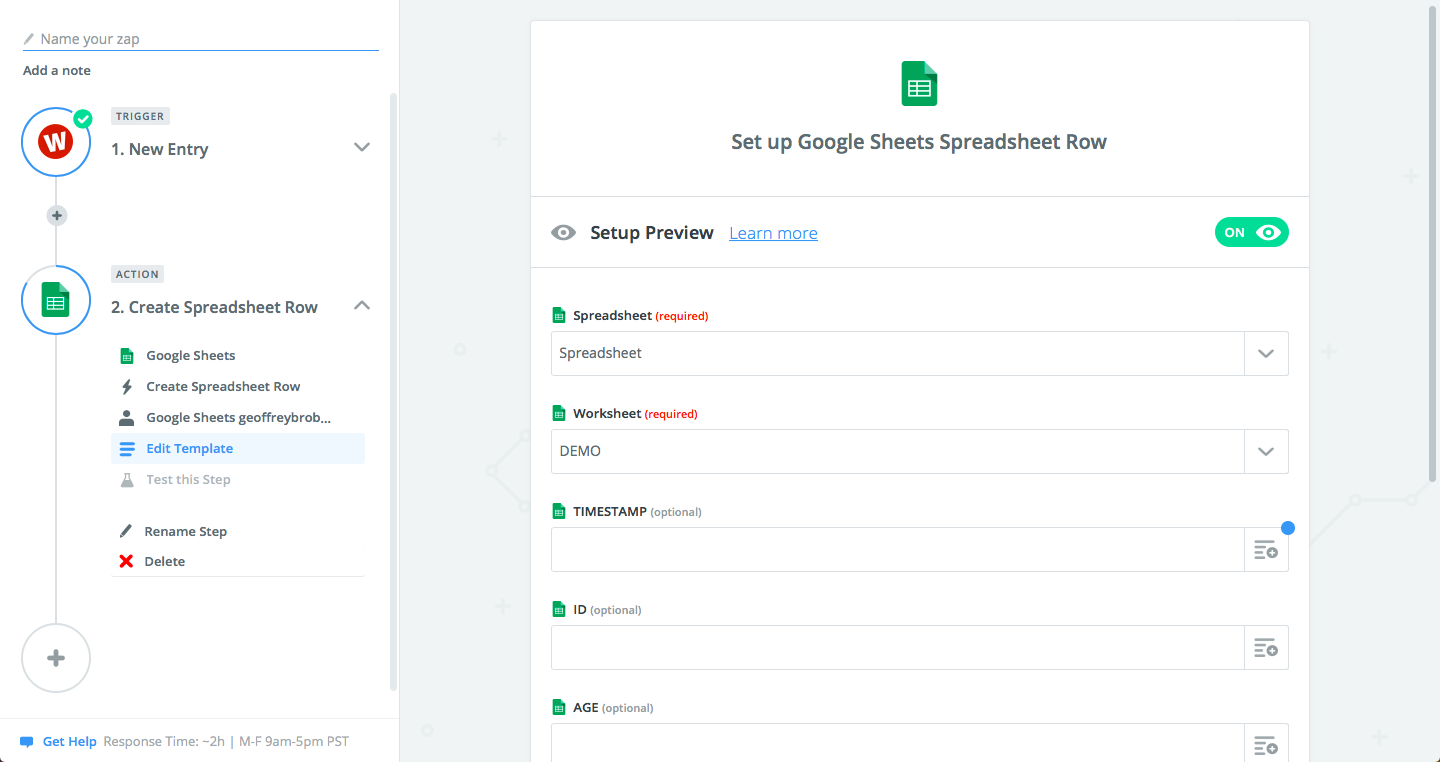
In the DEMO tab create the following column titles:
TIMESTAMP
ID
AGE
GENDER
CLASS

In the FEEDBACK tab create the following column titles:
TIMESTAMP
ID
FEEDBACK
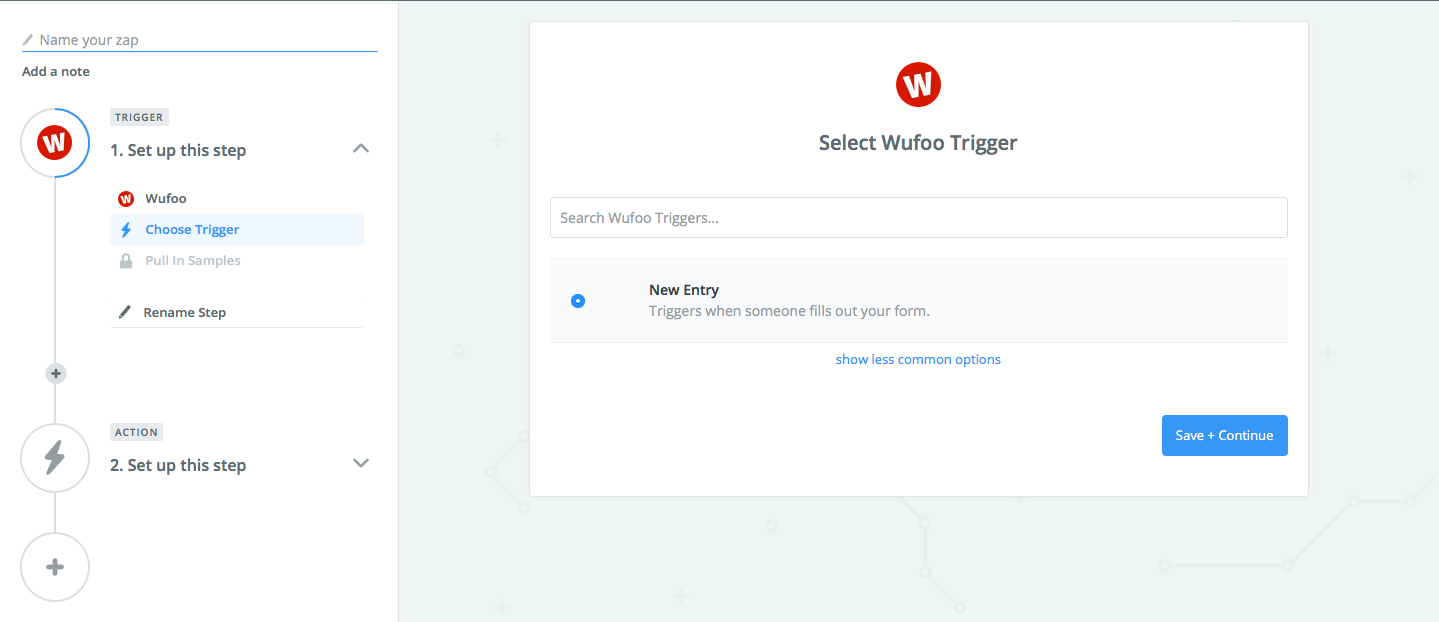
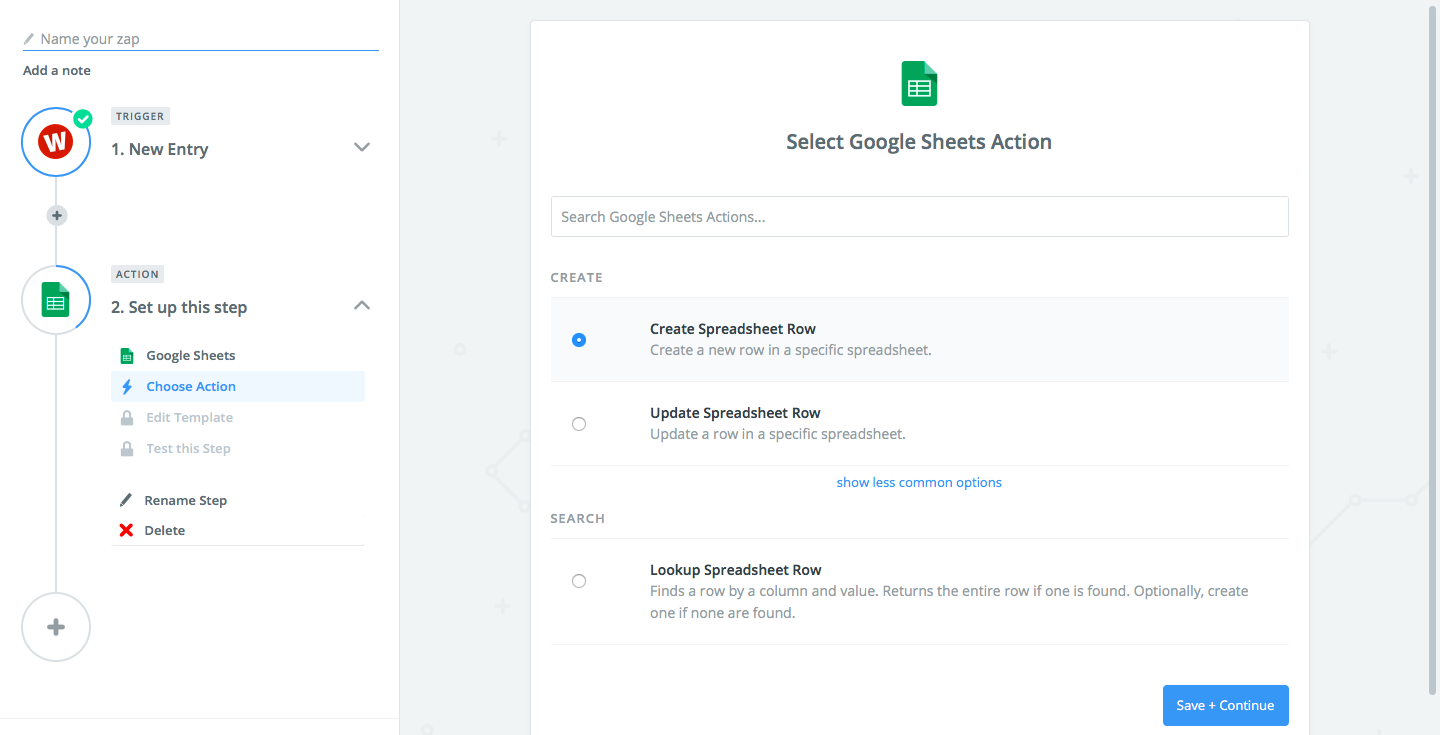
Alright, so at this point we’ve set up our collection mechanisms (i.e. Demographics and Feedback forms) and our corresponding receptacles (i.e. DEMO and FEEDBACK tabs in the spreadsheet). Now it’s time to set up our automation / aggregation mechanism.